5 Simple Watercolor Flowers you can Master Today
- Shayda Campbell
- Oct 27, 2020
- 3 min read
Updated: Mar 4, 2021
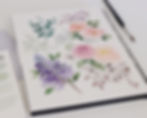
In this video I am sharing instructions for five loose watercolor florals that you can master right now. They are simple to do and its great for your confidence to know that there are a few more things that you can really paint. With this I don't want you thinking about the finished product of eucalyptus or lilac, but rather, thinking about your brushstrokes. A lot of these flowers come together with messy little lines or dots so that is where your focus should be.
Follow along with the video:
Shop my Supplies Here:
*Disclosure: I only recommend products I would use myself and all opinions expressed here are my own. This post contains affiliate links from which, at no additional cost to you, I earn a small commission from.

The first one is eucalyptus. Thinking about the brushwork, it begins with a very delicate stem where I use just the tip of the brush. For the leaves, I apply a little more paint and run the belly of the brush across the page to create the leaf. I use the tip of the brush to refine the leaves and allow them to come to a point. The leaves get larger as I move down the stem. As they dry, I layer some more paint to give them some more dimension.

The next is a simple flower and is all about the brushstrokes. I paint the flower one petal at a time, thinking about running the belly of the brush across the page. I use the end of the brush to make sure the petals aren't too perfect, so they are all unique and natural looking. If you make the ones at the bottom a little shorter it helps the flower look a little more concave. While it dries I add the leaves, trying to do each leaf in one or two brushstrokes. Then going back with the tip to change the shape and add a little more color. You don't want to mess with watercolors too much, its a leaf if you say it is, so don't worry too much about the shape. Finally, after the petals have dried, take a contrasting color to add some messy lines and dots for the stamen.

For the lilac I have a bunch of different purples mixed before I begin. With lots of paint in the belly of my brush i just run the brush across the page to create all these messy little ovals and dots in a quick motion. I grab from both purples to have variation in the color. It is so messy, it is really hard to mess up. I started smaller and it gets wider at the bottom. While it is still wet I use a dark green on the very tip of my brush to add little delicate stems, and the belly of the brush to surround it with some leaves. To keep it mixing with the purple, I add the green before finishing the purple, which now gets darker as I move down adding more messy little blossoms. At the very bottom I added some water to make it a little lighter. Since watercolors dry so quickly it can help to paint larger flowers in sections.

For the rose, I start with a dark pink cluster of dots for the center. I surround that with broken curving lines, getting larger and larger as I work outwards. I leave negative space in between so the white can give the impression of layers of petals. It's a fun, simple way to paint a rose just working out and creating a circle. For the second one I started with yellow and switched to peach for a nice blend of color. As with the other flowers, I grab a bit of green to create some loose messy leaves.

Finally, at the top and bottom of the page we finish with some messy little petals. Some are heart shapes, some are more v-shaped. With the tip of my brush I use brown to connect them with branches and leaves. Even though the petals were very nondescript, by the time you connect them, it really comes together for a finalized floral. Tiny little dots at the center create the stamen and really bring them to life.
Don't think about the form or outcome, you are just painting one petal or leaf at a time. It is all about the way you move the brush across the page. I hope you had fun with these and they give you a little more confidence painting florals.
